In This Article
Non-fungible tokens (NFTs) have grown beyond a niche market for profile pictures (PFP) art and digital collectibles to expand into real-world applications such as digital identity, ownership verification, retail goods and intellectual property (IP) rights.
For NFT collectors and crypto fans, picking the right wallet is essential. It needs to let you safely manage your assets and be easy to use, working well with different blockchains, marketplaces, and exchanges.
In this guide, we’ll explore the best NFT wallets in the market, highlighting their key features, security measures, and use cases, so you can find the perfect fit for your web3 journey.
Best NFT Wallets: Summary
NFT wallets are synonymous with cryptocurrency wallets. An NFT wallet is a device or software that allows you to store, access, send and receive crypto tokens. When choosing an NFT wallet, the first thing you should decide is whether you want to use a self-custodial wallet or a custodial wallet. Secondly, you have to check which blockchains and tokens that NFT wallet of your choice support. Lastly, you have to check the features, security measures and user-friendliness of the wallet.
Key Highlights
- NFT wallets are required to store and manage your on-chain NFT assets.
- They come in various types, including hardware and software wallets, each with pros and cons.
- Choosing the best NFT wallet depends on factors such as security, ease of use, and blockchain compatibility.
- Hardware wallets are considered the safest form of NFT storage as they keep digital assets in isolation from the internet.
- Software wallets are known for their user-friendly interface and feature-packed nature.
Top Wallets for NFTs in 2026
In this guide, we will explore popular NFT wallets such as MetaMask, Binance Wallet, Phantom, Ledger, Zengo, Exodus and Trezor. Whether you’re a collector, trader, or investor, there is a good mix of hot wallets and cold storage wallets to choose from in the list below.
Need a wallet that supports more than just NFTs? Best Wallet is among the fastest-growing options in the industry and ranks #1 in our Top Crypto Wallets article.
Zengo: Most Secure NFT Wallet
Zengo is a multi-chain self-custodial crypto wallet that is known for its robust security. So if you are worried about losing your NFTs to online attacks, Zengo may be the best crypto wallet for you. Zengo claims that its wallets have never been hacked since its founding in 2018.
Zengo also claims to have zero seed phrase vulnerability due to its multi-party computation (MPC) security. For context, MPC refers to a cryptographic technique where multiple parties evaluate a computation without revealing the data. Instead of using traditional seed phrases to secure its digital wallet, Zengo creates two “secret shares,” one of which is stored on your mobile device and the other is created and secured on Zengo’s servers.
Owners of high-value digital art collections, such as Bored Ape Yacht Club, which currently has a floor price of over 12 ETH (over $40,000), will be pleased to know that Zengo offers additional security features through the Zengo Pro subscription.
Zengo Pro is a premium self-custodial service that adds an extra layer of security through multi-factor authentication, web3 firewall, private transaction mode, inheritance features and multiple wallet creation. Zengo Pro is priced at $129.99 per year.

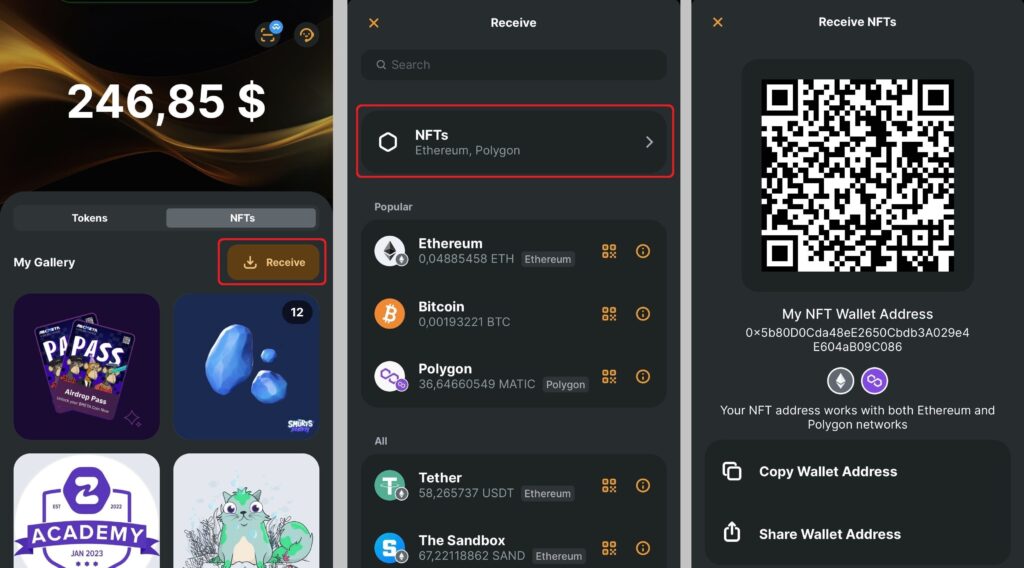
Guide to Storing NFTs on Zengo
At the time of writing, Zengo only supported NFTs on Ethereum and Polygon. The Zengo wallet mobile app has dedicated section on its home screen for your NFTs. Here is a step-by-step guide on how to manage NFTs on Zengo:
Receiving NFTs on Zengo:
- In the Zengo wallet home screen, tap on “NFTs”.
- Tap “Receive.”
- Tap “Actions.”
- Tap “Receive” to open the receive asset list.
- You will then be presented with your unique NFT wallet address. Use the address to receive NFTs on Ethereum or Polygon.
- You will receive a notification on your phone when your NFT tokens arrive.
Sending NFTs on Zengo:
- Open your Zengo app.
- Navigate to the NFT section.
- Select the NFT you wish to transfer.
- Tap “Send.”
- Enter the recipient wallet address.
- Check transaction fees and confirm the transfer.
Zengo Features
Here are the key NFT-related features on Zengo:
- No seed phrases management when setting up your NFT wallet.
- Dedicated NFT gallery on the app to receive, send and view NFTs.
- Ethereum and Polygon NFT support.
- NFT trading transaction history.
Zengo Pros and Cons
Pros
- Seedless wallet: Zengo is a seedless wallet which allows to easily set up a wallet for your NFT. You don’t have to worry about securing and managing your wallet seed phrase.
- NFT Gallery: Zengo has dedicated NFT gallery to receive, send and view NFTs.
- Strong security measures: Zengo wallets are secured by MPC cryptography.
- Multi-platform: You can use the Zengo wallet to manage your NFTs on your mobile devices and desktop.
Cons
- Limited blockchain networks: Zengo only supports NFTs on Ethereum and Polygon.
- Limited token standards: Zengo supports only a few NFT token standards such as ER721 and ERC1555.
- Limited formats: Zengo only supports JPGs, GIFs, and SVGs file formats.
Kraken: Custodial NFT Management with Built-In Marketplace Access
Kraken is one of the longest-running crypto exchanges in the space today, offering an NFT platform where users can store, trade, and manage NFTs across Ethereum, Solana, and Bitcoin networks. The platform handles private key management unlike most wallets, meaning users interact through the platform without needing to secure seed phrases or recovery backups themselves.
Kraken’s NFT component includes well-known collections such as Bored Ape Yacht Club, CryptoPunks, and DeGods, as well as Ordinals on the Bitcoin network. NFT transactions on Kraken do not include gas fees when trading within the marketplace. The system also connects directly to Kraken accounts, so users can manage cryptocurrencies and NFTs from a single dashboard.
When it comes to security too, Kraken manages to remain one of the best bets. Its security infrastructure combines cold storage for most digital assets, two-factor authentication, withdrawal approvals, and regular audits. While the platform holds custody of NFT assets, users benefit from simplified access and a streamlined environment without external wallet connections.
Guide to Storing NFTs on Kraken
NFT storage and transfer on Kraken works through the exchange interface, available on both desktop and mobile:
Receiving NFTs on Kraken:
- Sign in to a Kraken account.
- Go to the NFT section and select “Deposit NFT.”
- Choose the blockchain (Ethereum, Solana, or Bitcoin Ordinals).
- Copy the provided address.
- Provide this address to the sender or use it to transfer an NFT from another wallet.
- Incoming NFTs appear in the user’s account and are viewable through the NFT gallery.
Sending NFTs on Kraken:

- Open the NFT section in the account.
- Select the NFT to transfer.
- Enter the recipient’s address.
- Review fees and confirm the transfer.
Kraken NFT Features
- Ethereum, Solana, and Bitcoin Ordinals NFT support.
- NFT marketplace connected to crypto balances.
- No added gas fees when trading NFTs on-platform.
- Custodial security system with cold storage and account protections.
Kraken Pros and Cons
Pros
- Supports major NFT networks and collections.
- Simplified NFT trading without manual wallet management.
- Gas-free internal NFT trading.
- Secure platform with audited infrastructure.
Cons
- Custodial system; users do not hold private keys.
- Limited to supported assets within Kraken’s marketplace.
- No external dApp connections or NFT minting tools.
- Requires Kraken account to use.
Ellipal Titan 2.0: Air-Gapped NFT Hardware Wallet with Multi-Chain Support

Ellipal Titan 2.0 is a fully air-gapped hardware wallet designed to store NFTs and cryptocurrencies securely across multiple chains. It supports Ethereum, Polygon, Binance Smart Chain, Arbitrum, and more, making it one of the few hardware wallets built to handle NFTs beyond Bitcoin-based assets. The Titan connects with the Ellipal mobile app, where users can manage tokens, NFTs, and decentralized applications while keeping private keys offline.
Transactions are signed using QR codes between the hardware device and the mobile app. There are no USB ports, Bluetooth, Wi-Fi, or NFC, reducing attack surfaces and keeping private keys fully isolated from online connections. The hardware is tamper-resistant, with a self-destruct mechanism that wipes keys if a physical breach is detected.
Guide to Storing NFTs on Ellipal
The Ellipal mobile app offers a dedicated NFT section for supported chains. Here’s how users manage their NFTs:
Receiving NFTs on Ellipal:
- Connect the Ellipal Titan 2.0 to the mobile app.
- Go to the NFT section and select the relevant blockchain.
- Copy the provided NFT receiving address.
- Share this address to receive NFTs from marketplaces or other wallets.
- View incoming NFTs directly in the app once confirmed on-chain.
Sending NFTs on Ellipal:
- Open the Ellipal app and navigate to the NFT you want to send.
- Enter the recipient’s wallet address.
- Review gas fees and details.
- Use the Titan device to scan and sign the transaction via QR code.
- Finalize and broadcast the signed transaction from the mobile app.
Ellipal NFT Features
- Ethereum, Polygon, BNB Chain, and Arbitrum NFT support.
- Dedicated NFT gallery in the Ellipal app.
- Air-gapped QR code signing without internet connections.
- Integration with decentralized apps through WalletConnect.
Ellipal Pros and Cons
Pros
- Air-gapped NFT storage with no online attack points.
- Multi-chain NFT and token support.
- NFT viewing and management inside the mobile app.
- Tamper-resistant hardware with self-wipe security.
Cons
- Requires mobile app pairing for management.
- No built-in staking or DeFi aggregator tools.
- Setup can take extra time for new users.
- Higher gas fees apply on busy networks.
D’Cent Wallet: Biometric Hardware and Mobile App for Multi-Chain NFT Storage
D’Cent Wallet offers a combination of hardware-level security and mobile convenience for users who want to store and manage NFTs across multiple blockchain networks. It supports Ethereum, Polygon, Binance Smart Chain, and Klaytn, giving access to a wide variety of NFTs, from art and collectibles to gaming assets. Users can choose between the free mobile app for non-custodial management or add the D’Cent biometric hardware wallet for extra protection.
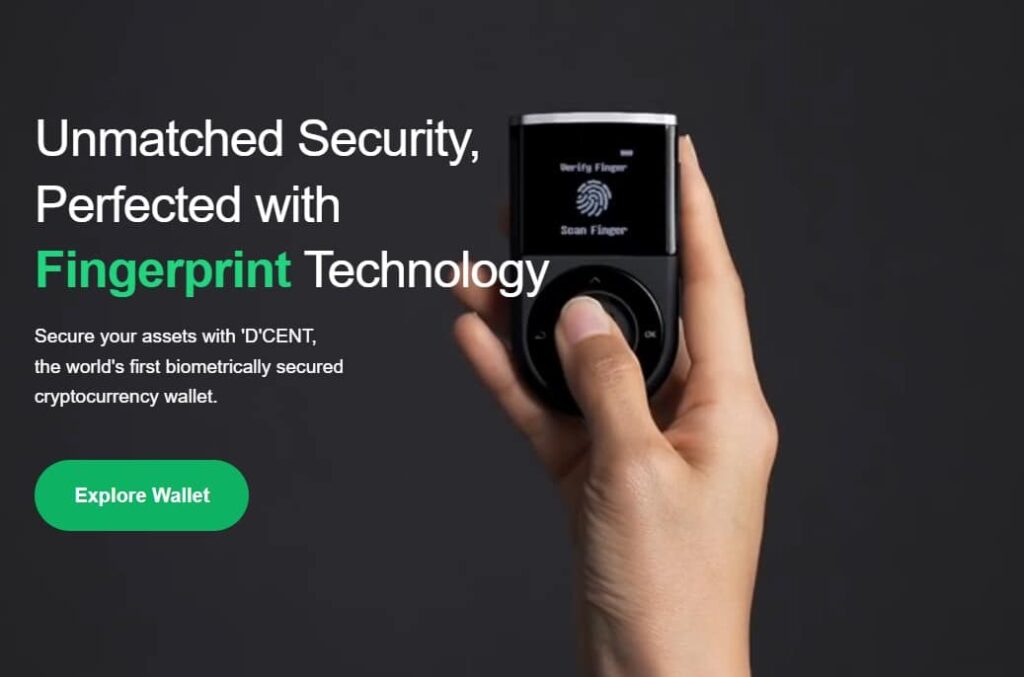
The hardware wallet includes a built-in fingerprint sensor, allowing users to authorize transactions with biometric confirmation. It connects to the D’Cent mobile app via Bluetooth, making it possible to sign transactions without exposing private keys to online environments. This setup ensures that NFT transfers, sales, or listings can be carried out securely, even when interacting with decentralized applications.
The mobile app on its own is a feature-rich platform. It provides a dedicated NFT section where users can view, send, receive, and organize their NFT collections. It also integrates swap functions, staking tools, and WalletConnect support, opening access to DeFi platforms, NFT marketplaces, and gaming dApps without needing external software.
Guide to Storing NFTs on D’Cent
D’Cent’s mobile app includes a dedicated section for NFT management across supported chains. Here’s how the process works:
Receiving NFTs on D’Cent:
- Open the D’Cent mobile app and navigate to the NFT section.
- Select the blockchain (Ethereum, Polygon, Klaytn, or BNB Chain).
- Copy your unique NFT receiving address.
- Share this address with the sender or enter it at checkout on NFT marketplaces.
- Once confirmed on-chain, the NFT will appear in your app gallery.
Sending NFTs on D’Cent:
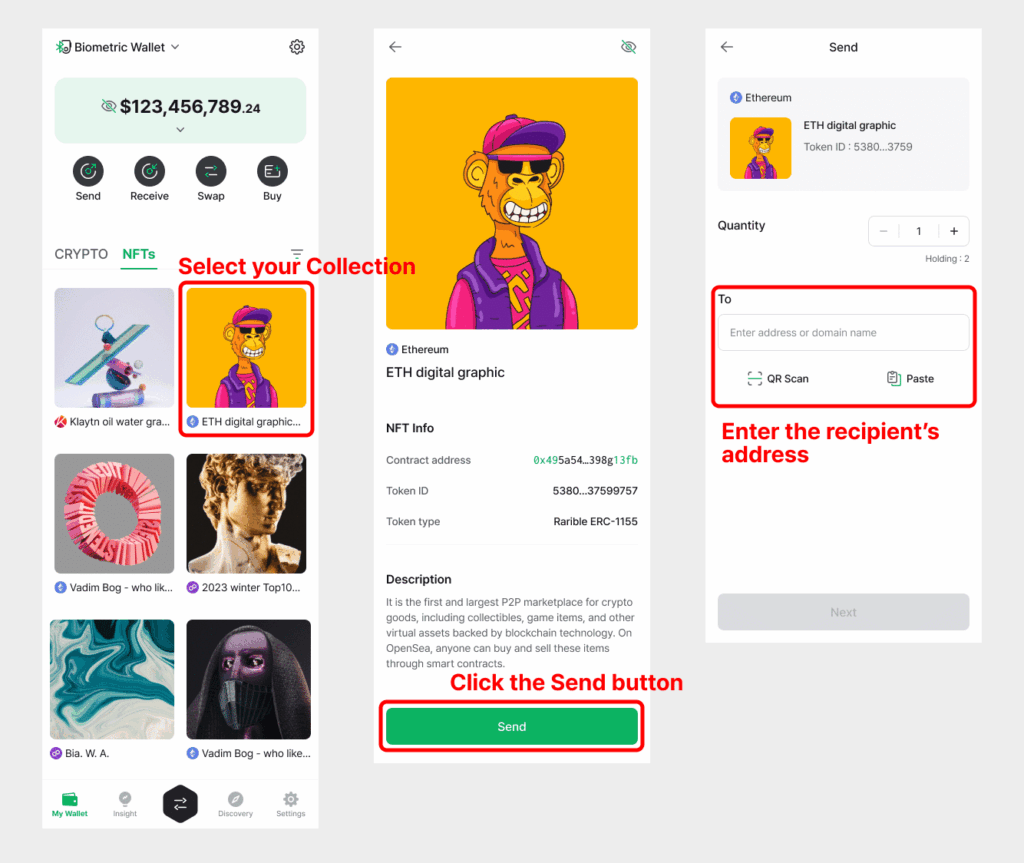
- Open the D’Cent app and select the NFT you want to send.
- Enter the recipient’s wallet address.
- Check gas fees and confirm the transaction.
- If using the hardware wallet, sign the transaction via Bluetooth using fingerprint authentication.
- Complete the process and track the transfer inside the app.
D’Cent NFT Features
- NFT storage across Ethereum, Polygon, Klaytn, and BNB Chain.
- Biometric hardware signing for added protection.
- NFT gallery with viewing and management inside the app.
- dApp and DeFi integration through WalletConnect.
D’Cent Pros and Cons
Pros
- Multi-chain NFT support with hardware or mobile.
- Fingerprint-secured hardware signing.
- Non-custodial storage and dApp access.
- Built-in NFT gallery and swap features.
Cons
- Hardware device sold separately.
- Bluetooth setup required for hardware signing.
- No native desktop application.
- Gas fees vary with network activity.
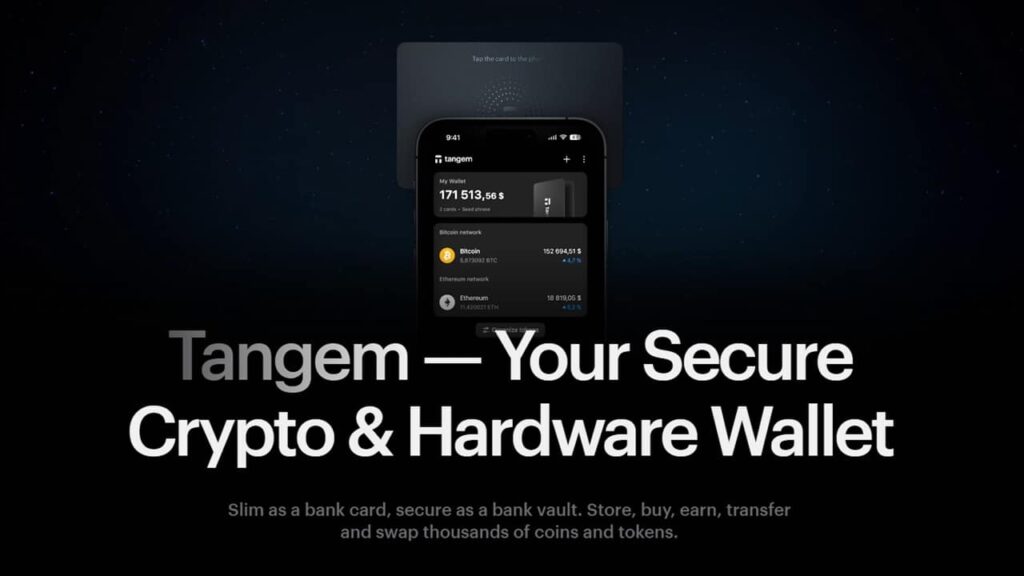
Tangem Wallet: NFC-Enabled Hardware Wallet for Mobile NFT Management
Tangem Wallet takes a unique approach to crypto and NFT storage by offering a hardware wallet the size of a credit card that works entirely through NFC (near-field communication) with a mobile app. The Tangem card contains a secure chip that generates and holds private keys, which never leave the device. To authorize NFT or crypto transactions, users simply tap the card to their smartphone, signing securely without cables, Bluetooth, or Wi-Fi.
The system is designed to simplify secure storage while eliminating some of the traditional hardware wallet complexities. Users can hold NFTs on Ethereum, Binance Smart Chain, and Polygon, among other supported networks, and manage them through the Tangem mobile app. While the card itself has no battery or display, the app provides an interface for viewing assets, managing transactions, and interacting with decentralized applications.
What sets Tangem apart is its multi-card backup system. Users can set up two or three Tangem cards during wallet creation, allowing for recovery if one card is lost or damaged. This removes the need for a written seed phrase, reducing the risk of loss through paper backups while maintaining non-custodial control over assets.
Guide to Storing NFTs on Tangem
Receiving NFTs on Tangem:
- Install the Tangem app and activate your card.
- Navigate to the NFT section in the app and select the blockchain you want to use.
- Copy the NFT receiving address from the app.
- Share this address with the sender or input it on the NFT marketplace checkout page.
- Once the transfer is complete, the NFT will appear in your in-app portfolio, where you can view its details.
Sending NFTs on Tangem:
- Open the Tangem app and go to the NFT you want to transfer.
- Enter the recipient’s address and review network fees.
- Tap the Tangem card to your phone to authorize and sign the transaction securely.
- Confirm the transfer in the app and monitor its progress on-chain.
Tangem NFT Features
- Ethereum, BNB Chain, and Polygon NFT support.
- Tap-to-sign transactions using NFC-enabled Tangem cards.
- No batteries, screens, or cables required.
- Multi-card backup system for seedless recovery.
Tangem Pros and Cons
Pros
- Compact, portable hardware with secure chip.
- Seedless recovery using multi-card backups.
- NFT storage and management on multiple chains.
- No physical connections or battery dependency.
Cons
- No native desktop or browser interface.
- Limited dApp integrations compared to software wallets.
- Requires physical card for every transaction approval.
- Currently focused on selected chains and token standards.
Cypherock X1: Seedless Hardware Wallet with Sharded NFT Security
Cypherock X1 is an advanced hardware wallet designed for users who want to secure their crypto and NFTs without relying on a traditional seed phrase. Instead, it uses a sharded security system based on Shamir Secret Sharing. The wallet splits the private key into five parts, storing one inside the X1 Vault (hardware device) and the other four on separate X1 Cards. To approve any transaction, including NFT transfers, the Vault and just one card are required, removing single points of failure while maintaining full non-custodial control.
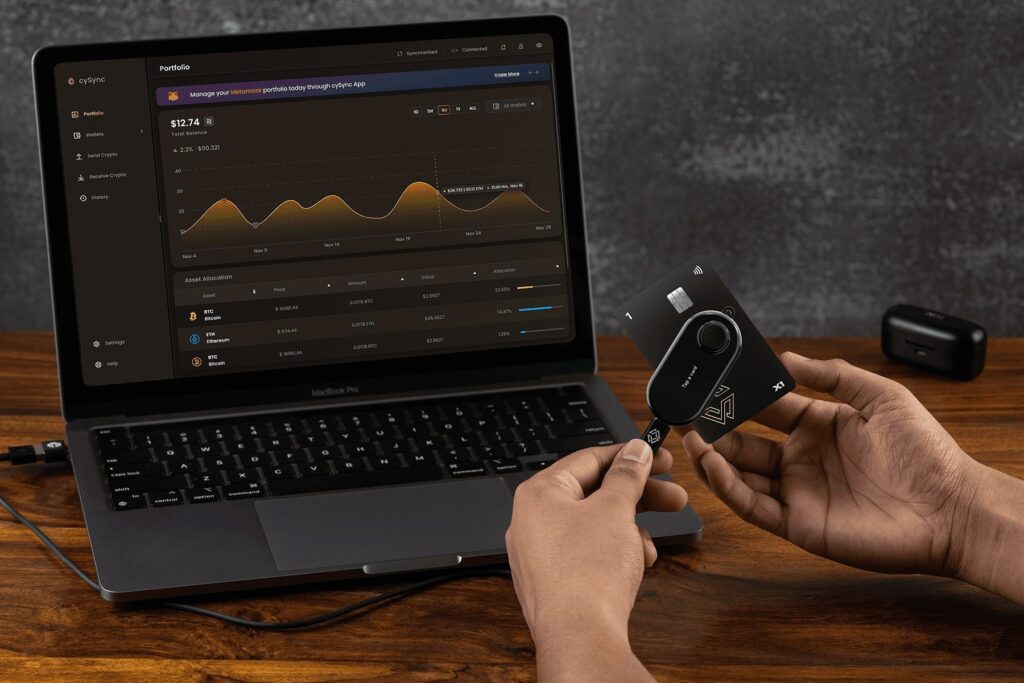
Cypherock supports over 9,000 assets, including NFTs on Ethereum and other EVM-compatible chains. Users manage their portfolios using the cySync desktop application, which connects to the X1 Vault over USB-C. While the device itself remains offline, cySync allows users to monitor holdings, track balances, and prepare transactions, including NFT transfers, which are finalized only when signed through the Vault + Card system.
One of the standout aspects of Cypherock’s design is its built-in inheritance feature, allowing users to designate recovery methods without disclosing seed phrases to family or lawyers. This feature extends to all supported assets, including NFTs, making it a rare option for collectors looking to secure high-value digital art or gaming assets for long-term holding.
Guide to Storing NFTs on Cypherock
Receiving NFTs on Cypherock:
- Set up the X1 Vault and sync it with the cySync desktop app.
- Navigate to the Ethereum or EVM-compatible wallet section.
- Copy your unique NFT receiving address.
- Use this address for marketplace purchases or peer-to-peer transfers.
- Once confirmed, NFTs will display in the cySync portfolio view.
Sending NFTs on Cypherock:
- Prepare the transfer in the cySync app by selecting the NFT and entering the destination address.
- Review gas fees and transaction details.
- Connect the X1 Vault and scan one X1 Card to authorize the transaction.
- Sign the transaction using the device and confirm broadcast through cySync.
Cypherock NFT Features
- Seedless hardware security with sharded private key storage.
- Ethereum and EVM-compatible NFT support.
- cySync desktop interface for portfolio management.
- Built-in inheritance and recovery system.
Cypherock Pros and Cons
Pros
- No seed phrase required for setup or recovery.
- Sharded key storage removes single points of failure.
- Supports large NFT collections on Ethereum and EVM chains.
- Dedicated desktop app for tracking and managing assets.
Cons
- No mobile app; desktop only via cySync.
- Requires both hardware Vault and at least one Card for approvals.
- Limited blockchain support outside of EVM-compatible networks.
- Setup process is more advanced compared to standard wallets.
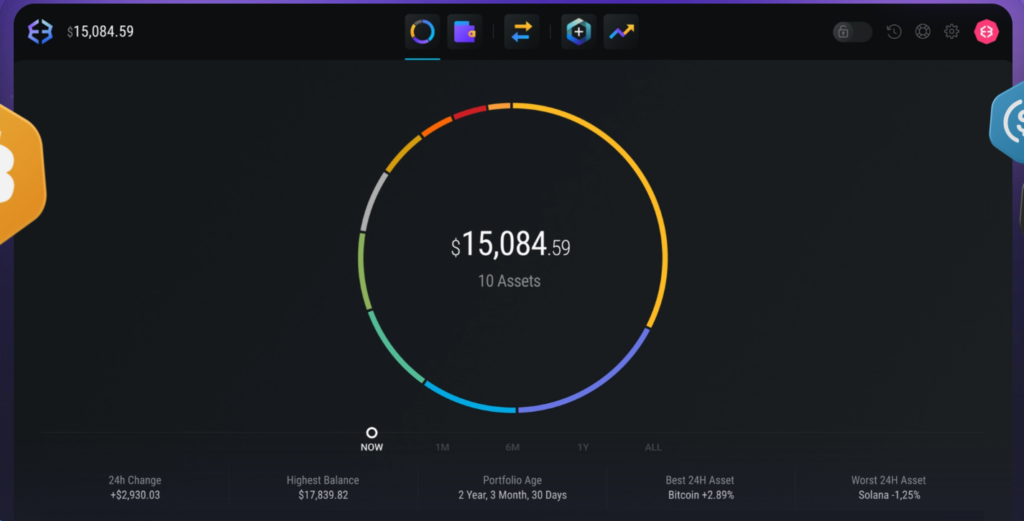
Exodus: Offers Most Convenient NFT Storage
Exodus is a cryptocurrency wallet that focuses on providing a user-friendly experience to crypto self-custody. Exodus’ goal is to “remove the geek requirement, and keep design a priority, to make cryptocurrency easy for everyone.”
The wallet was created by a NYSE American-listed blockchain development company called Exodus Movement. The company was co-founded in 2015 by JP Richardson and Daniel Castagnoli. At the end of 2024, Exodus had over 4.5 million customers.
Exodus Wallet is available as a mobile application, desktop application and browser extension allowing easy access to your NFTs across various personal devices. The wallet supports over 50 blockchain networks including Bitcoin, Ethereum, Solana, BNB Chain, OP Mainnet, Tron, Avalanche, Arbitrum, Polygon and more. Key features of the Exodus Wallet include Trezor hard wallet integration, staking, auto-restaking, fiat-to-crypto swaps, web3 browsing and customer support.
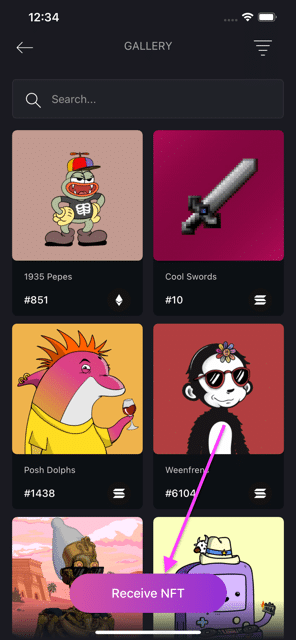
For digital collectible traders and investors, Exodus stands out as a top wallet in the NFT space due to features such as the NFT Gallery. This user interface-focused feature displays all your digital collectibles in one place, allows easy NFT trading and shows detailed NFT transaction history. A key drawback of the Exodus wallet is that non-standard ERC-721 NFT token types such as ERC-721A, ERC-721xyz, and ERC-721 Enumerable are not supported.
Exodus’ development team’s expertise within the NFT sector is well documented in its collaboration with NFT marketplace Magic Eden. In 2024, Magic Eden leveraged Exodus Movement’s XO Swap technology to develop an NFT wallet optimized for efficient trading and cross-chain NFT management.
Guide to Storing NFTs on Exodus
At the time of writing, Exodus supports NFTs on Ethereum, Algorand, Avalanche, Base, BNB Chain, Cardano, Fantom, Polygon, Solana and Tezos. Here is a step-by-step guide on how to manage NFTs on Exodus.
Receiving NFTs on Exodus:
- In Exodus Mobile wallet, tap the Profile icon, then tap on “NFTs”.
- Tap “Receive NFT.”
- To select the network, tap the dropdown menu.
- Select the network you want to receive the NFT on.
- To receive an NFT, scan the QR code or copy and paste the address in the sender’s wallet.
Sending NFTs on Exodus:
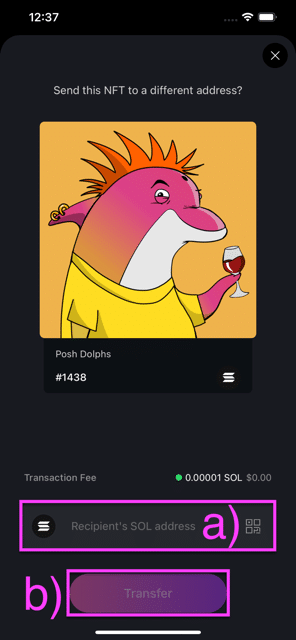
- In Exodus Mobile wallet, head to the NFT Gallery and tap on the NFT you want to send.
- Tap “Transfer.”
- Paste in the address you want to send the NFT to, or scan its QR code by tapping on the QR icon.
- Tap “Transfer.”
Exodus Features
Here are the key NFT-related features on Exodus:
- Receiving, sending and viewing NFTs.
- Setting a custom price for your NFTs.
- Sharing NFTs without transferring ownership.
- Hiding unwanted NFTs.
- Checking NFT transaction history.
- NFT support across 10 blockchain networks including Ethereum, Base and Solana.
Exodus Pros and Cons
Pros
- Multi-chain support: Exodus supports over 50 blockchain networks including Bitcoin, Ethereum, Solana, BNB Smart Chain, OP Mainnet, Tron, Avalanche, Arbitrum, Polygon and more.
- NFT Gallery: NFT Gallery feature on Exodus allows you to manage, send and receive in one place.
- Multi-platform: Exodus is available as a desktop application, mobile version and browser extension allowing easy access to your NFTs across all your personal devices.
- Trezor cold wallet integration: You can manage and swap your NFT tokens in Exodus securely from your Trezor cold wallet.
Cons
- No support for certain token standards: Non-standard ERC-721 NFT token types such as ERC-721A, ERC-721xyz, and ERC-721 Enumerable are not supported.
- Limited security features: Two-factor authentication is not available on Exodus.
- Not fully open-source: Exodus is not completely open-source making it harder for the community to audit for vulnerabilities.
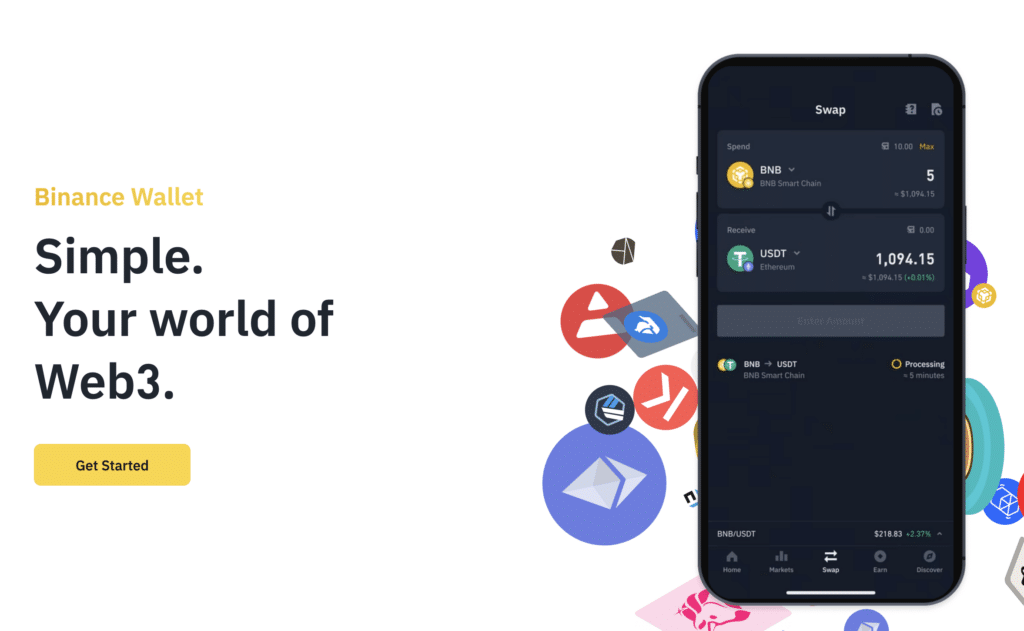
Binance Wallet: Easy setup but lacks NFT features
Binance Wallet is a self-custodial crypto wallet that exists within the Binance crypto exchange app. If you are an existing Binance customer, the Binance Wallet can be a suitable choice for you to self-custody your NFTs. You can create a new Binance Wallet in the click of a button via your Binance app. The keyless and seedless nature of the wallet makes it a convenient option for beginners.
However, Binance Wallet is a not a great fit for NFT enthusiasts as the wallet does not have a dedicated NFT management system built in the wallet. Bear in mind that the Binance Wallet can store your NFTs but viewing and transfering your digital collectible tokens will require you to use a third-party interface such as OpenSea.
Guide to Managing NFTs on Binance Wallet
At the time of writing, Binance Wallet supports tokens across different blockchains including Bitcoin, Ethereum, Polygon, Solana, Avalanche and Base. Here is a step-by-step guide on how to manage NFTs on Binance Wallet:
Managing NFTs on Binance Wallet:
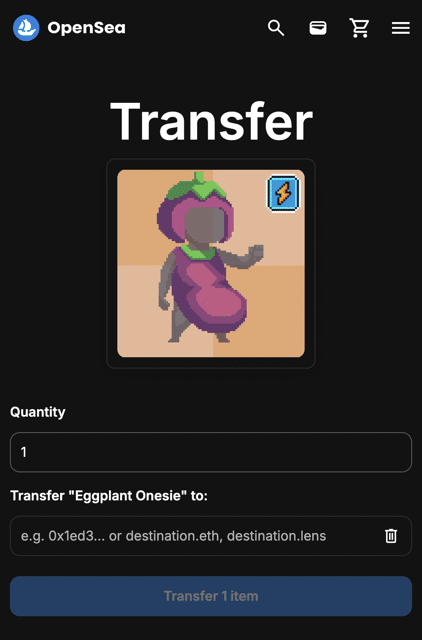
- Since Binance Wallet does not have a dedicated section to manage NFT tokens, you will have to go to a third-party website. We have used the OpenSea NFT marketplace as our example.
- So go to the OpenSea website on your desktop and tap “Log in.”
- Under “Connect to OpenSea”, select “WalletConnect.”
- A QR code will show up. On the Binance Wallet mobile app home page, select “Scan.”
- Confirm the request on your Binance mobile app.
- On the OpenSea website, go to your profile. You will be able to see your NFT collection there. There you can list your NFT for sale and transfer it to another address.
- If you want to transfer NFTs to another address, tap on the three dots icon under the NFT you want to transfer.
- Select “Transfer.”
- Enter the recipient’s wallet address and hit “Transfer”
- You will receive a request on your Binance Wallet. Check the gas fees and then hit “confirm.”
- Your NFT transfer will be completed.
Binance Wallet Features
Here are the key NFT-related features on Binance Wallet:
- No seed phrases management needed to set up your NFT wallet.
- Support across numerous blockchains including Bitcoin, Ethereum, Polygon, Solana, Avalanche and Base.
- In-app support for inscription decentralized applications.
Binance Wallet Pros and Cons
Pros
- Easy setup wallet: Existing Binance customers can easily create a new Binance Wallet in the click of a button.
- Seedless wallet: You do not need to worry about managing seed phrases.
- Multi-chain support: Support across numerous blockchains including Bitcoin, Ethereum, Polygon, Solana, Avalanche and Base.
Cons
- No dedicated NFT management system: You cannot manage your NFTs on your Binance Wallet as there is no dedicated section for it.
- Not suited for NFT intermediates and professionals: Binance Wallet is a good fit for beginners due to its easy setup but it lacks NFT-specific features that NFT enthusiasts seek.
MetaMask: Best Ethereum Wallet for NFTs
MetaMask is one of the most recognizable self-custodial crypto wallet in the world. It was launched in 2016 by Consensys, a blockchain software development company created by Ethereum co-founder Joseph Lubin. MetaMask started as an Ethereum wallet but it has now expanded to support all EVM blockchains.
The MetaMask wallet is known for its all-round performance, making it a great choice for NFT enthusiasts and DeFi users. MetaMask’s open source system known as Snaps allows anyone to add features and extend the functionality of the crypto wallet. Its feature-packed nature, multi-chain support and NFT-friendly interface make it one of the best crypto wallets out there to store your Ethereum NFTs.
A key drawback of MetaMask is that the wallet does not support non-EVM chains such as Bitcoin, Solana and Cardano.

Guide to managing NFTs on MetaMask
MetaMask supports some of the largest blockchains in the world including Ethereum, BNB Chain, Base, Avalanche and Polygon. Here is a step-to-step guide on managing NFTs on the MetaMask mobile app:
Receiving NFTs on MetaMask:
- In the MetaMask wallet home screen, tap on the icon with two arrows at the bottom of your screen.
- Tap “Receive.”
- A QR code will show up. You will also find the option to copy your wallet address.
- Use the address or QR code to receive NFTs on Ethereum or any other EVM chain.
Sending NFTs on MetaMask:
- Open your MetaMask app.
- In the MetaMask wallet home screen, tap on “NFTs” button to open the NFT gallery.
- Select the NFT you want to transfer.
- Tap “Send” on the bottom of your screen.
- Enter the recipient’s wallet address or scan their wallet QR code.
- Check transaction fees and confirm the transfer. Hit “Next”
- The next screen will display the estimated transaction fees.
- Hit “Send” and confirm the transaction when prompted.
Metamask Features
Some NFT-related key features on MetaMask Wallet include:
- MetaMask has a feature called MetaMask Portfolio that allows you to manage all your NFTs across different blockchains in one place.
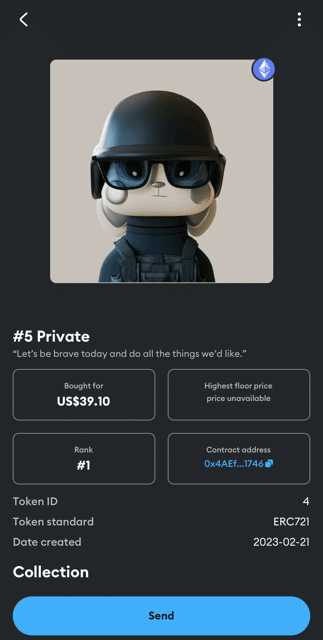
- It also give your information about your NFTs such as metadata, contract address, cost price, and floor price all in one place.
- MetaMask supports NFT tokens on Ethereum and other EVM blockchains.
- MetaMask Snaps allows new features such as transactions insights, display notifications and privacy protection.
Metamask Pros and Cons
Pros
- Feature packed: MetaMask Snaps allows new features such as transactions insights, display notifications and privacy protection.
- MetaMask Portfolio: MetaMask Portfolio allows you to manage all your NFTs across different blockchains in one place. It also gives your information about your NFTs such as metadata, contract address, cost price, and floor price all in one place.
- Multi-chain support: MetaMask supports NFTs on all EVM blockchains including Ethereum, BNB Chain, Base, Avalanche and Polygon.
- Multi-platform: You can use the MetaMask wallet to manage your NFTs on your mobile devices and desktop.
Cons
- No support for non-EVM chains: MetaMask does not support NFTs that are on non-EVM chains such as Bitcoin, Solana and Cardano.
- Limited transfers: Currently, sending NFTs is only supported for ERC-721 tokens on MetaMask.
Ledger Flex: Best Hardware Wallet to Store NFTs
Ledger Flex is the bluetooth-enabled hardware wallet that stores digital assets in isolation from the internet. As the crypto wallet is not connected to the internet, it adds an extra layer of security from online hacks. The wallet is built with a CC EAL5+ certified secure chip and is protected by a 4-8 digit PIN code.
Flex was launched by a crypto wallet company called Ledger. The wallet’s bluetooth feature allows it to communicate with mobile devices enabling quick access to your NFTs and other digital assets on the go. User can manage tokens stored on Ledger Flex using the Ledger Live Mobile app for receiving and sending natively supported cryptocurrencies. But perhaps the most useful feature for NFT enthusiasts is the display screen on the Ledger Flex that allows users to display their favorite digital collectible on the go.

Guide to Storing NFT on Ledger Flex
Ledger’s hardware wallets can be used to secure NFTs. Technically speaking, your Ledger Flex will store the private keys, which is used to authorize transactions and prove ownership of your NFT tokens. You can then connect your Ledger Flex hardware wallet to the Ledger Live Mobile app or a compatible third-party software wallet to manage your NFTs. To prevent unauthorized access, transactions conducted will have to be signed using your hardware wallet.
Ledger Flex Features
Here are the key NFT-related features on Ledger Flex:
- Ledger Flex is a hardware wallet which means that the private keys that give access to your NFTs are stored in isolation from the internet.
- It has bluetooth and USB-C connectivity allowing you to connect the wallet to your mobile device and desktop to manage your NFTs.
- Ledger Flex can be used to store your NFTs across multiple blockchains as the wallet can connect with the Ledger Live app or a compatible third-party software wallet.
- Flex comes with a 2.84-inch touchscreen display that you can use to view your NFTs.
Ledger Flex Pros and Cons
Pros
- Security: Hardware wallets like Ledger Flex are known for their secure storage. Private keys that give access to your NFTs are stored in isolation from the internet on Ledger Flex.
- Bluetooth, NFC and USB-C Connectivity: Ledger Flex has Bluetooth, NFC and USB-C connectivity allowing you to connect the wallet to your mobile device and desktop to manage your NFTs.
- Multi-chain support: Ledger Flex is compatible with over 50 software wallets across various blockchain networks.
- Asset recovery: Ledger offers users a subscription based services called called Ledger Recover for those who want to back up their wallet access. This service can be used to recover assets if you lose your device.
- Touchscreen display: Ledger Flex features a 2.84-inch touchscreen display for easy transaction signing and NFT display.
Cons
- Cost: Unlike software wallets which are free, hardware wallets like Ledger Flex are costly. At the time of writing, Ledger Flex was priced at $249.
- Not suitable for beginners: Hardware wallets can be difficult to setup therefore are not recommended for beginners.
- Risk of misplacement and theft: Physical wallets like Ledger Flex can be lost to misplacement and theft.
Trezor Safe 5: User-Friendly Cold Wallet for NFTs
Trezor Safe 5 is a touchscreen-enabled hardware wallet that allows you to store your NFTs and cryptocurrency tokens offline. Like the Ledger Flex wallet, the Trezor Safe 5 isolates your tokens from the internet, ensuring hackers cannot target your digital assets or compromise their security.
On setup, you will have to create a wallet PIN and passphrase which will secure your Trezor Safe 5 wallet. Users will also be given a list of 12 words known as seed phrases which can be used to recover your crypto assets in case you lose your device. At the time of writing, Trezor Safe 5 was priced at $169.

Guide to Storing NFTs on Trezor Safe 5
Your Trezor Safe 5 hardware wallet stores the private keys that gives you access to your NFTs. In order to manage your NFTs, you have to connect your wallet to Trezor’s token management application called Trezor Suite. You have to download the Trezor Suite app on your desktop and connect your wallet to the device via the USC-C cable. You can also connect it to a compatible software wallet to view, transfer and trade NFTs. Whenever a transaction is initiated, you will receive a notification on your Trezor Safe 5 hardware wallet to authorize the transaction.
Trezor Safe 5 Features
Here are the key NFT-related features on Trezor Safe 5:
- Trezor Safe 5 securely stores your NFTs in isolation from the internet, securing it from online attacks.
- Trezor Safe 5 comes with USB-C connectivity which allows users to connect their wallets to their desktop to manage their NFTs.
- It uses the Tor Network to provide identity protection features.
- Trezor Safe 5 can be used to store your NFTs across multiple blockchains. The wallet is compatible with over 40 third party software wallet such as MetaMask, Exodus and Backpack.
- Trezor Safe 5 features haptic feedback for transaction notifications and signature requests.
Trezor Safe 5 Pros and Cons
Pros
- Cold storage facility to safely secure your NFTs from online attacks.
- USB-C connectivity to connect the wallet to your desktop to manage your NFTs.
- Store your NFTs across multiple blockchains.
- Features Tor Network to protect personal information and provide identity protection features.
- Haptic feedback for transaction notifications and signature requests.
Cons
- Trezor Safe 5 was priced at $169.
- Hardware wallets like Trezor Safe 5 requires users to manage seed phrases and set up pass phrases which can be a tedious process.
- Physical wallets like Trezor Safe 5 can be lost to misplacement and theft.
Phantom: Top Wallet for Solana-based NFTs
Phantom Wallet is a software wallet best known for native support for the Solana blockchain. The wallet has expanded to provide multi-chain support for different cryptocurrencies on the Bitcoin, Ethereum, Polygon and Base blockchains. It launched in 2021 and has amassed over 32 million downloads so far.
Phantom Wallet is one of our top picks if you want to trade NFTs on the Solana blockchain. The wallet has excellent user experience features related to NFTs such as the Collectibles tab to manage your NFTs and to mint NFTs. The “Instant Sell” feature also allows users to easily monitor buy offers and accept NFT sales across various NFT marketplaces.

Guide to Storing NFT on Phantom
You can use Phantom to manage and store NFTs on Solana, Ethereum, Bitcoin, Polygon and Base. Here is a step-to-step guide on managing NFTs on the Phantom Wallet mobile app:
Receiving NFTs on Phantom Wallet:
- Open your Phantom Wallet mobile app.
- Go to the Collectibles tab by tapping the second icon on the bottom left of your screen.
- Tap on the “+” icon on the top right corner of your screen.
- Tap on “Receive Collectible.”
- Select the blockchain network. You can use the QR code or the wallet address to receive the NFT.
Sending NFTs on Phantom Wallet:
- Open your Phantom Wallet app.
- Go to the Collectibles tab by tapping the second icon on the bottom left of your screen.
- Select the NFT you want to transfer.
- Tap on the “Send” icon.
- Enter the recipient’s wallet address or scan their wallet QR code.
- Check transaction fees and confirm the transfer. Tap “Next.”
- Hit “Send” and confirm the transaction when prompted.
Phantom Features
Here are the key NFT-related features on Phantom Wallet:
- Your Collectibles Tab: Phantom Wallet has a dedicated NFT management interface to view, hide, sell and transfer your NFTs.
- Avatar: You can use your NFTs to set up a display picture for your wallet using the “Avatar” feature.
- Instant Sell: The Instant sell feature allows you to check bids and confirm sales instantly on various NFT marketplaces such as Blur, OpenSea, X2Y2, LooksRare, Magic Eden, and Tensor.
- Minting NFTs: You can instantly mint NFTs using your Phantom Wallet.
Phantom Pros and Cons
Pros
- Feature-packed: The Phantom Wallet offers various NFT-related features such as minting, Instant Sell, Avatar and a dedicated NFT management interface called Your Collectibles.
- Multi-chain support: The Phantom Wallet can store NFTs on Solana, Ethereum, Bitcoin, Polygon and Base.
- Multi-platform: Phantom wallet comes as a mobile application and a browser extension.
Cons
- Limited Ethereum L2 support: Phantom Wallet only supported one Ethereum L2 network – Base – at the time of writing.
- Two-factor authentication: Phantom Wallet does not support two-factor authentication.
How to Choose the Best NFT Wallets?
Choosing the best NFT wallet ultimately boils down to your choice of blockchain network, customer support, security, features and cost preferences. Here are the main points that you should consider when choosing a crypto wallet to store your NFTs.
Blockchain Compatibility
Which blockchain network do you use the most? Where are the majority of your on-chain crypto assets stored? Which NFT marketplace are you planning on using for minting and trading NFTs? These are the question you may want to ask yourself before choosing an NFT wallet. Keep in mind that majority of NFT wallets do not support all blockchains in the world.
For example, If you have most of your crypto funds in ETH and you choose an NFT wallet that only supports Cardano, you will have to go through tedious process of converting ETH to ADA to start transacting on the Cardano-support wallet. Remember you have to pay gas fees in the native token to pay for NFT transactions.
Security Features
If security is your main concern, you may want to choose a hardware wallet like Ledger Flex or Trezor Safe 5 as your go-to NFT wallet. As we explained earlier, hardware wallet provide maximum security by isolating your NFTs from the internet. In comparison, hot wallets like MetaMask and Phantom are always connected to the internet making them susceptible to online attacks and hacks.
Ease of Use
Easy of use is incredibly important for NFT enthusiasts. If your wallet does not have a dedicated NFT management interface you will have to connect to software and websites provided by third parties to buy, sell and manage NFTs. This leads to tedious and unnecessary extra steps which can be prevented by choosing a different type of NFT wallet.
Cost preference
The biggest advantage that software wallets hold over hardware wallet is the cost. Software wallets are free to download and use. Meanwhile, hardware wallets like Ledger Flex and Trezor Safe 5 can cost you over $100.
Support for Multiple NFTs
There are different types of NFT tokens. ERC-721 tokens is the most common type of token standard that is used to create NFTs. The ERC-1155 standard is an improved form of the ERC-721 standard that is used to batch multiple NFT tokens into a single contract to gas costs incurred. Always check which token standards your NFT wallet can support. This step is particularly important for NFT artists and creators.
Recovery and Backup Options
It is always recommended to choose an NFT wallet provider that offers easy and reliable recovery and backup features. The future is uncertain and you never know when you can lose access to your wallet that holds your NFTs worth thousands of dollars. Recovery and backup options are crucial if you lose your mobile device with your NFT wallet application, forget your wallet passcode, or need to transfer your wallet to a new device.
Customer Support
An NFT wallet that provides reliable customer support is underrated. The crypto world is constantly evolving. Technological innovation and upgrades can introduce unknown wallet issues. Having a constant customer support as provided by Exodus and Zengo is always a bonus point.
Conclusion: Best NFT Wallets
Whether you are a beginner or an expert in NFTs, there is always a suitable NFT wallet to choose from the plethora of options out there. Ledger Flex and Trezor Safe 5 are good choices for experienced NFT investors who hold valuable digital collectibles that call for best security options. Meanwhile, software wallets like Exodus, Zengo, MetaMask and Phantom are highly versatile NFT wallets that offer user-friendly features and support for the most popular blockchains in the world.
See Also:
- Best Crypto Wallets in the UK for 2026: Tested and Verified
- Top Web3 Wallets You Can Trust in 2026
- Best Monero Wallets in 2026 to Store XMR
- Top 5 NFT Marketplaces in July 2026
- Best NFT Gambling Sites 2026
- Best New Cryptocurrencies to Invest in 2026
- 7 High-Risk High-Reward Cryptos
FAQs
What are some best wallets for storing NFTs?

Ledger Flex and Trezor Safe 5 are good choices for experienced NFT investors who hold valuable digital collectibles that call for best security options. Meanwhile, software wallets like Exodus, Zengo, MetaMask and Phantom are highly versatile NFT wallets that offer user-friendly features and support for the most popular blockchains in the world.
Are hardware wallets the safest for storing NFTs?
Hardware wallets like Ledger Flex and Trezor Safe 5 keep NFT tokens isolated from the internet ensuring that your digital assets are not targeted by hackers and are not susceptible to security breaches.
Do NFT wallets charge fees?
NFT wallets require gas fees to conduct on-chain transactions.
What security features should I look for in an NFT wallet?
Multi-factor authentication, PINs and cold storage are some security features you should look at in an NFT wallet.
How do I connect my NFT wallet to an NFT marketplace?
You can connect your wallet to a NFT marketplace by heading to the marketplace website and logging in using your wallet.
Is it safe to store NFTs on my phone using a mobile wallet?
Software wallets that are available as mobile applications are suspectible to online hacks and attacks. Always check transaction signature requests before signing.
Can I access my NFTs from multiple devices?
Yes, you can access NFTs from multiple devices as several crypto wallets are available as a mobile app and a browser extension.
What makes an NFT wallet safe?
Features like multi-factor authentication, PINs and cold storage are some security features that make an NFT wallet safe.
References:
- Exodus, Exodus NFT Gallery, https://www.exodus.com/support/en/articles/8598815-what-is-the-nft-gallery-in-exodus#network
- Zengo, Zengo NFT storing and viewing, https://help.zengo.com/en/articles/6803613-storing-and-viewing-nfts-on-zengo
- Phantom, Instant Sell, https://help.phantom.com/hc/en-us/articles/19178734346003-How-to-use-Instant-Sell-feature-to-sell-NFTs
Why you can trust 99Bitcoins
Established in 2013, 99Bitcoin’s team members have been crypto experts since Bitcoin’s Early days.
Weekly Research
100k+Monthly readers
Expert contributors
2000+Crypto Projects Reviewed