The Beginner’s Guide to Litecoin Mining
By: Ian MacPhee | Last updated: 1/5/24
Since its creation in 2011, Litecoin has remained a close second to Bitcoin, dubbed as the “silver to Bitcoin’s gold”. This guide will show you how to get started mining Litecoin or other Scrypt coins with your L3+.
Litecoin Mining Summary
Here’s a quick guide to mining Litecoins:
- Hook up the Litecoin miner to your computer
- Configure the miner
- Join a Litecoin mining pool
- Start mining Litecoin!
I know it sounds extremely simple, but that’s how you mine Litecoin in a nutshell. If you want a detailed explanation keep on reading. Here’s what I’ll cover:
- Bitmain’s Antminer L3 series
- Setting up the miner
- Choosing a mining pool
- The risks of ASIC mining
- Frequently Asked Questions
- Conclusion
Don’t like to read? Watch our video guide:
1. Bitmain’s Antminer L3 Series
In this guide I will use the Antmier L3+, a very powerful ASIC miner that uses Scrypt to mine Litecoin. ASIC stands for Application Specific Integrated Circuit and it means that these miners are made solely for the purpose of mining a specific coin, making them super efficient.
The L3+ debuted in 2017 and was very profitable for a long time. In fact, it made around $20-$30 per day, even with rising difficulties and network hashrates.
This winning streak was primarily due to the epic price run that Litecoin made in 2017. It went all the way from under $3 at the beginning of the year to over $300 at the height of the crypto market in December.
My personal story of getting an L3 had some ups and downs. I desperately tried to get one when it was released but due to extremely high demand it was always sold out on Bitmain. I finally bought one on Amazon and ended up getting scammed. However, Amazon came through for me and I received a refund.
Eventually I got my hands on several L3s, but I guess the moral of this story is: Buy directly from the Original Equipment Manufacturer (OEM).
This guide also applies to the L3++, which is a little faster and a little more expensive than the L3+. In my opinion, there’s an upside to cheap ASIC miners: If and when crypto prices take off, the profitability of cheaper miners will go through the roof. So within a single bull-market cycle, you’ll quickly get an ROI many times over.
2. Setting Up the Miner
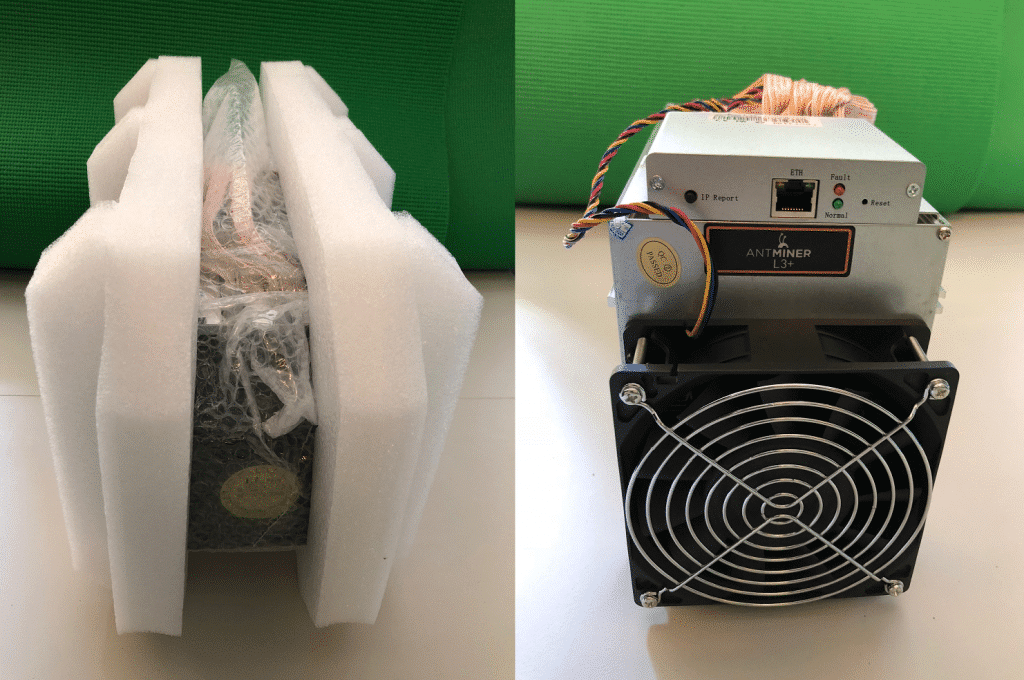
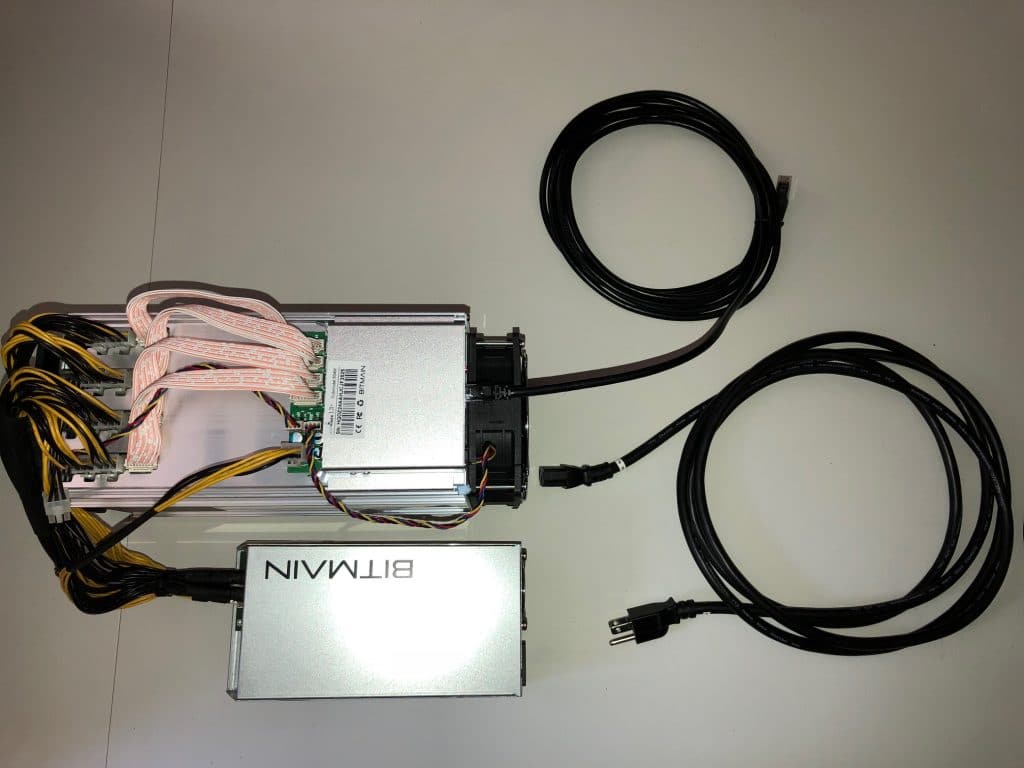
Step 1 – Unbox and hook everything up
- All 9 PCI-e connections (2 on each of the 4 hashing boards, and 1 on the controller)
- The Ethernet cable (from the L3+ to your router)
- The power cord
Once the power cord is in, the miner should power on automatically.
Step 2 – Log in to miner’s interface
- Download the free IP Scanner tool (Angry IP Scanner).
- Install and run the Angry IP Scanner.
- Click “Start” to scan and detect devices on your local network
- After the scan completes, click “Go to” at the top menu bar and then click “Next alive host”. Do this until ‘Antminer’ appears in the ‘Hostname’ column.
- Note: In some cases the hostname might be missing i.e. you will only see an IP address. In case this happens, you will need to perform the next step on several IPs until you find Antminer’s address.
- Once you find it, right-click on it and choose “Copy IP.” Paste the IP into your browser’s URL line.
- Login with ‘root’ for both username and password
Here’s how the whole process should look:
3. Choosing a Mining Pool
Joining a mining pool is a good way to make a constant revenue stream with your miner. In this chapter, I will show you how to set up your L3+ with two different mining pools, depending on the way you want to be paid out.
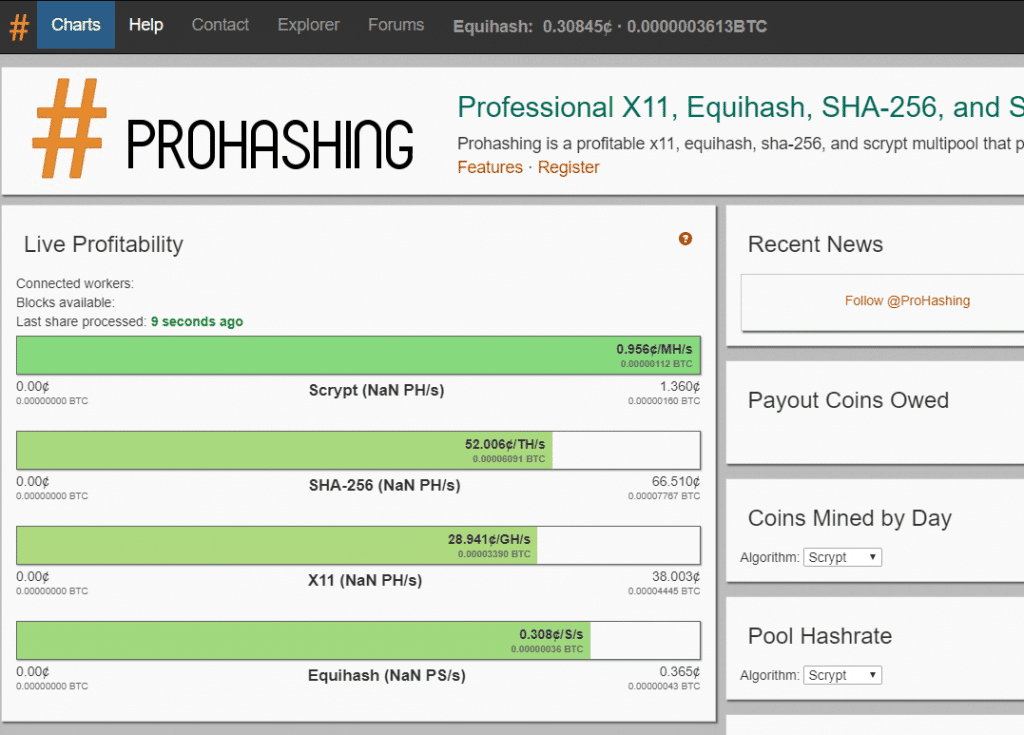
#Prohashing – For mining multiple coins
Prohashing’s strongest point is this – They automatically mine the most profitable coins for each supported algorithm (such as Scrypt, SHA-256, X11, and Equihash).
Also, you get paid in the coin you choose, regardless of the coin you mined.
Thanks to ProHashing’s smart system you’ll likely make more Litecoins than you would have by just mining Litecoin on another pool. This way you’re spared from making all the calculations in the hunt for the most profitable pools.
This system also allows you to get payment in coins that you think have a higher likelihood of increasing in value over time.
So, with Prohashing, you don’t have to put all your eggs in one basket. You can get paid via any number of coins, with any weight you assign. This way, you can utilize your strategy across multiple coins or mix in some long-term coins if you prefer.
#ProHashing Setup
When logged in to your Antminer, go to the “Miner Configuration” page and enter the following:
- URL: prohashing.com:3333
- WORKER: <enter your ProHashing Account Username here>
- PASSWORD: n=<WorkerName>, a=<Algorithm to mine>
To configure which coins you want to get paid in, click “Settings” then “Payout Proportions”. Make sure you have a wallet address ready for each coin you want to get paid in.
Example:
- URL: prohashing.com:3333
- WORKER: Techman34
- PASSWORD: n=myL3, a=scrypt
NiceHash
For our second pool, we’re going to mine on NiceHash and get paid in Bitcoin.
An important pool strategy is to use multiple pool services so you have an unrelated failover setup. This way, the likelihood of both pools being down at the same time (and your machine being idle and losing money) is much smaller.
NiceHash setup
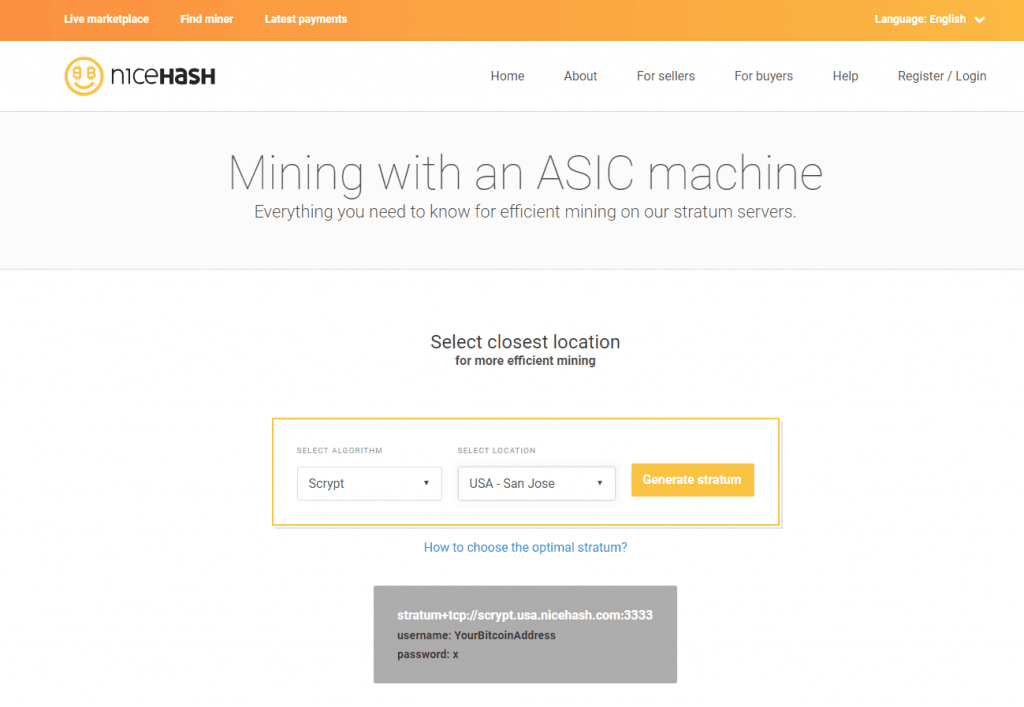
- Go to the NiceHash ASIC page.
- In the “SELECT ALGORITHM” drop-down, choose “Scrypt.”
- Under “SELECT LOCATION,” choose your region or the closest one to you.
- Click the “Generate Stratum” button.
- The output URL should look something like:
stratum+tcp://scrypt.<your_region>.nicehash.com:3333 - Copy the URL, and paste it into your 2nd Pool under your Antminer Miner Configuration tab.
Example:
- URL: stratum+tcp://scrypt.usa.nicehash.com:3333
- WORKER: 37UPzLMoFE7i41qChPPXh7RxPprXWyMZBy.myL3
- PASSWORD: x
Note: For WORKER, use the Bitcoin address you want the BTC to be transferred to + any worker name with (.) between them, as in the example.
For the third and final Pool URL, I’ll use a Nicehash EU server:
- URL: stratum+tcp://scrypt.eu.nicehash.com:3333
- WORKER: 37UPzLMoFE7i41qChPPXh7RxPprXWyMZBy.myL3
- PASSWORD: x
Hit “Save & Apply” in the bottom-right corner of your Miner Configuration tab, and you’re off and mining with your L3+!
4. The Risks of ASIC Mining
Unlike GPU mining rigs that harness the power of PC gaming gear for mining, ASIC hardware was designed solely for the purpose of mining. While this may seem like a win-win situation for everyone, some coin developers don’t like the idea of ASIC manufacturers having a say in their development.
These developers fear that powerful ASICs could lead to large, centralized mining farms and potentially even launch a 51% attack.
Due to that, there is some risk involved in buying an ASIC miner in the long run. Since ASICs are only useful if they’re compatible with the coin they mine, the coin developers could change the code to render the ASIC useless.
For example, Bitmain X3 was developed for mining Monero and it was very successful at that for a while. However, eventually, the Monero development team forked the coin, and the ASICs were no longer compatible with it.
Still, many ASICs can be quite profitable in the long run. Coin developers for Bitcoin, Dash, and Sia, to name a few, allow ASIC miners to mine their coins.
Also, in the Monero case I mentioned above, the X3s were eventually used to mine other CryptoNight coins that haven’t forked yet and were actually quite profitable.
5. Frequently Asked Questions
How Many Litecoins are Left?
74,060,938 Litecoins have been mined as of January 5, 2024, leaving 9,939,063 Litecoins to be mined.
Is Mining Litecoin Profitable?
Yes. If you have the right setup (i.e., low electricity cost and a cool environment), it’s still profitable to mine Liteocin. In order to find out if you can be profitable, use a Litecoin mining calculator.
How Long Does it Take to Mine 1 Litecoin?
Using the L3++ with a difficulty factor of 13,667,659.27727 it will take you 45 days to mine 1 Litecoin.
5. Conclusion
That’s it for the beginner’s guide to mining Litecoin with your L3 ASIC Miner. I hope you’ve found this guide useful. As you can see, within 10 minutes, you can have your ASIC miner running and earning you some coins.
If you run into any issues or have questions, please comment in the field below or in the video comments, or contact me on Twitter at @cryptocg. However you reach out, I’ll try to help.
If you’re interested in taking your crypto mining to the next level, sign up at Crypto Mining Academy. There, I offer a comprehensive course that provides massive detail about every step of the mining process.
Happy Mining!
Ian (a.k.a. Techman34 on the Ethereum forums)


How do I mine bit coin and how long does it take for me to mine it ?
It can typically take about 10 minutes to mine bitcoin. Here is a link that will help you get started: https://www.bitcoinmining.com/getting-started/
Wow I love litecoin
Hi, thank you very much, my favorite site for crypto and after long waiting finally wanted to start today, sadly. Just got 2 of these little babies but I can’t get any further than the main page, no other tab like configuration works, always this message pops up: 404 not found on that server and a bin missing, sorry, I made a screen but can’t see where to upload. any suggestions?
Hi Richard,
I would suggest uploading to an image hosting site like imgur.com and then linking to the image there.
I also like this thread – https://bitcointalk.org/index.php?topic=47417.0
Hi , very good guide! I need a a complete beginner’s guide for Innosilicon A5 dashmaster to mining x11. Do you have?
Hi Andrea,
Yes, you’re in luck. Please see our guide to mining Dash here:
https://99bitcoins.com/how-to-mine-dash-beginner-mining-guide/
There is also a Dash mining calculator here which might help:
https://99bitcoins.com/dash-mining-calculator/
3333 is compromised by the way.