 1 Comment
This is a small tutorial to introduce the new Darkcoin wallet with DarkSend. It has so many new features, that I felt a little introduction to it would smooth the learning curve for anyone feeling overwhelmed. I hope this will encourage people to go ahead and try out DarkSend for themselves. I don’t think anyone will want to go back to any wallet that doesn’t provide privacy after realizing how easy DarkSend is to use and privacy is to achieve.
Getting Started With the Darkcoin Wallet
First, when you start your wallet, you will see our new splash screen. It is a little preview of the new design for our upcoming GUI (graphics user interface). I think it looks great!
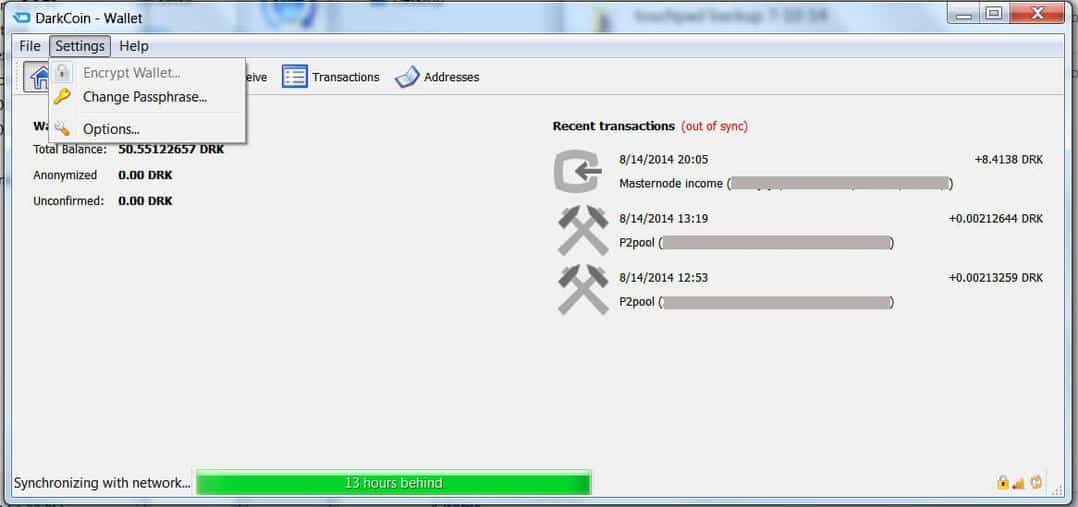
To use DarkSend, you will need to set a few things up. The first thing we will do is enable the DarkSend “coin control features” First go to Settings > Options…. As shown below:
and choose Display.

Under the Display tab, click the box that says “display coin control features (experts only)” and hit Apply. Now I don’t know why it’s “experts only” because really, you want to use this if you are using DarkSend for your transactions. It gives you so much control and information. This allows you to see where your coins stand and is where all the action is! But before we go to the Send tab, where you will see this extra information, we need to get DarkSend working. So we have to go to the Main tab.
How to Activate Darksend in the Darkcoin Wallet
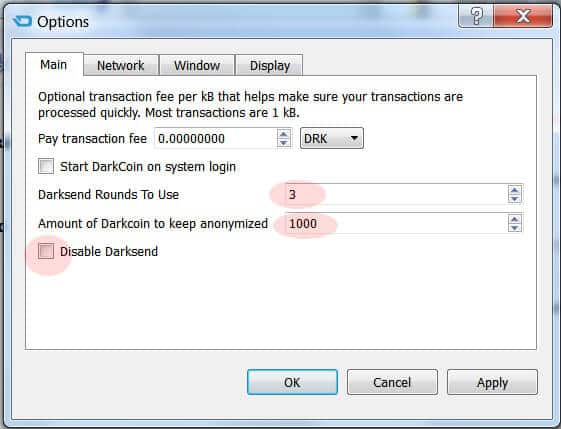
The wallet has DarkSend turned off by default because there are small fees involved in using the DarkSend function. However, the team felt it was important that people not be charged fees without consent. So to use DarkSend, you will need to turn it on. This is done by unclicking the “Disable DarkSend” check mark. Next, choose how many rounds of mixing you would like the wallet to use. Setting this to 1 equals 1 round, which is enough to give you privacy from most people. Or you can choose all the way up to 8 darksend rounds for the most secure, most impossible, quite outrageously private number of rounds to send your coins through.
I chose 3 because I think that would give me extreme security, and because I wanted to see the system work a little harder than 2. The final number is how many coins the wallet should keep denominated. If you put in 50, then the wallet will keep 50 coins on hand at all times that are anonymous even if you have 1000 coins, only 50 will be kept pre mixed and at the ready. The default is 1000, but that is not a limit, you could set it to 5000 or 10000, etc.. You may set this at any amount you prefer. So, at this point, click Apply and OK!

When the options window closes, your wallet should ask you for your passphrase to unlock it. If it doesn’t, you may need to close it and reopen your wallet. If you still have trouble, you may not have hit “apply” on the main tab of the options window. So if you’re ready to start, go ahead and enter your passphrase. But if you are not ready at this time (can’t keep your computer on for the next few hours or something, just hit cancel. It will ask you once again the next time you open your wallet.
Now your wallet will be unlocked for the next few hours or more, depending on the number of coins you are mixing, and the number of rounds. You can check on the locked status of your wallet in the lower right of the main Overview tab.
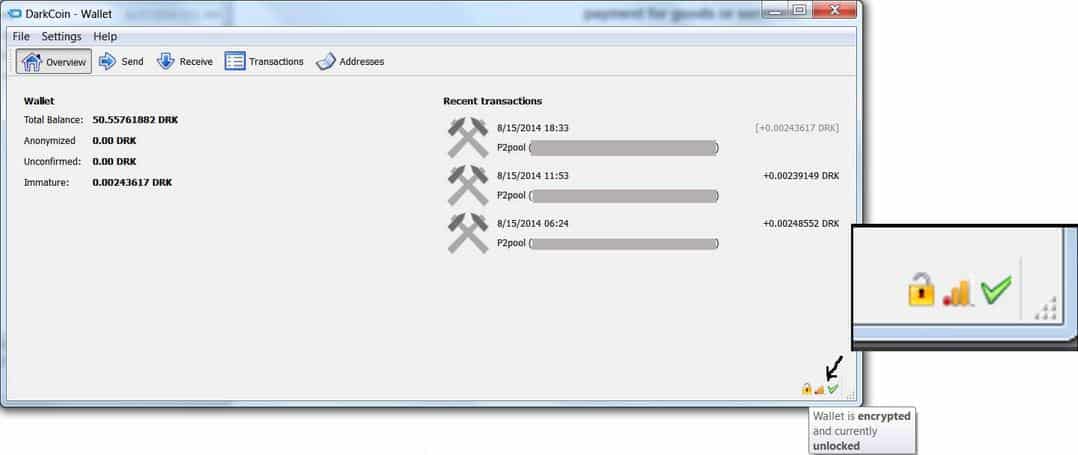
When you hover your mouse over these icons, it will say Wallet is encrypted and currently unlocked. When it is finished mixing your coins, it will show the lock icon closed and the message will read that it is locked. If this doesn’t happen, you can close your wallet and reopen it again. Hit cancel when it asks you for your password, and your wallet will be locked. Make sure your wallet is indeed finished otherwise you will receive a small disconnect penalty fee.
Darkcoin’s Coin Control Features
So let us learn about the Coin Control Features!
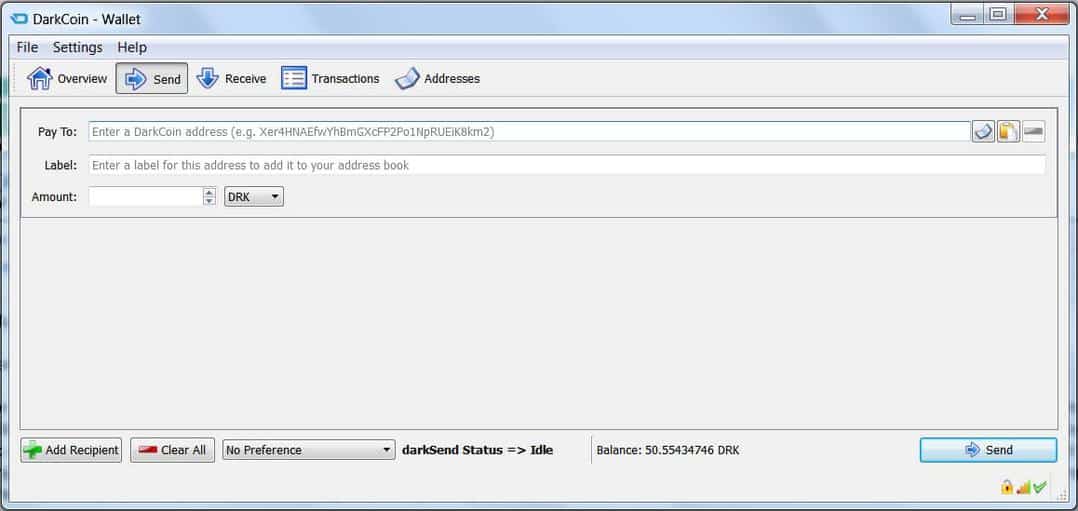
You may remember how your send tab used to look, just like any other Bitcoin based wallet:
But because of the settings we just changed, you now have a soup’d up Send tab!
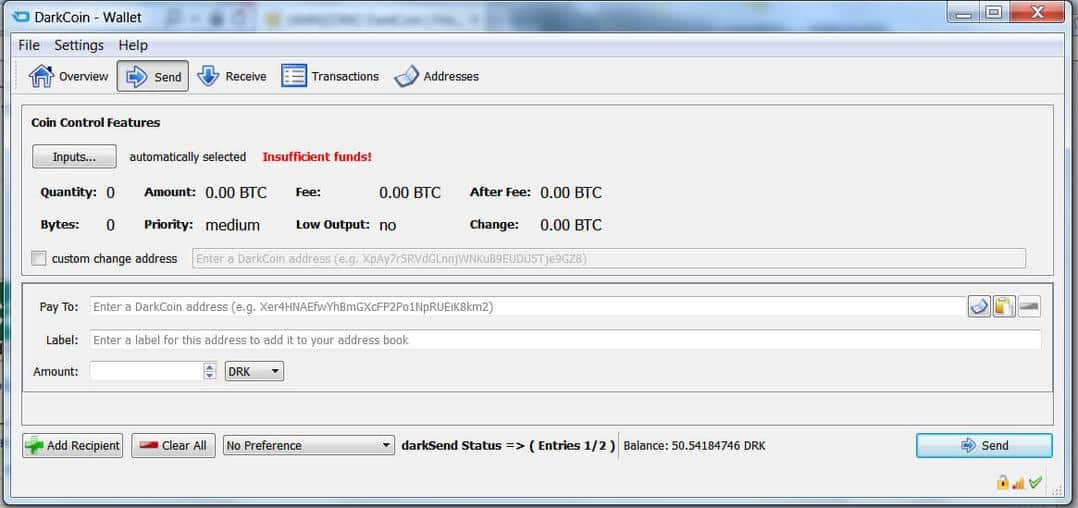
Starting from the bottom, you can see some familiar buttons. The Add Recipient button simply adds another pay to extension so that you can make several payments at one time, and Clear All clears all the entries you made so you can start over again. Now we come to something new. This drop down menu allows you to tell your wallet what type of funds you want used. No Preference will use which ever funds work, anonymous (denominated) or non-anonymous funds are self explanatory. DarkSend Status => shows the status of any inputs your wallet is handling. As shown above, I have an input and am waiting for another person to join the pool. Finally, you can see your total balance and the send button.
Next section up is where you enter the account number for the person you wish to pay. Label it appropriately “Mom’s account” and of course the amount you wish to send. This functions exactly the way all other wallets in the Bitcoin family function.
Now we get to the good stuff! The top section is the Coin Control section. It shows everything about your wallet’s contents.

Above, I have chosen to use a single anonymous account number worth 10 coins, I chose it via the inputs button which I will show you in a moment. When you choose your inputs, all the information you need is right here at your fingertips. You can see you’re using 1 account (Quantity) You can see what the value in that account is (Amount) by using this account, the calculated fees are there (Fee) and if your transaction is small enough in bytes, there is no fee. This fee, if there was one, would be deducted from your balance in that particular account and would be displayed under After Fee. This is the largest amount you may send at this time, with the choices you’ve made. This section also tells you how many bytes this transaction will be, and it is this information that determines the fee, you can see your priority setting there, and I don’t believe there is a way to change that yet. I believe in the future, you’ll be able to pay to be bumped up for quicker processing. So if I chose a group of accounts, and wanted to send 44 coins anonymously, this is what it would look like:
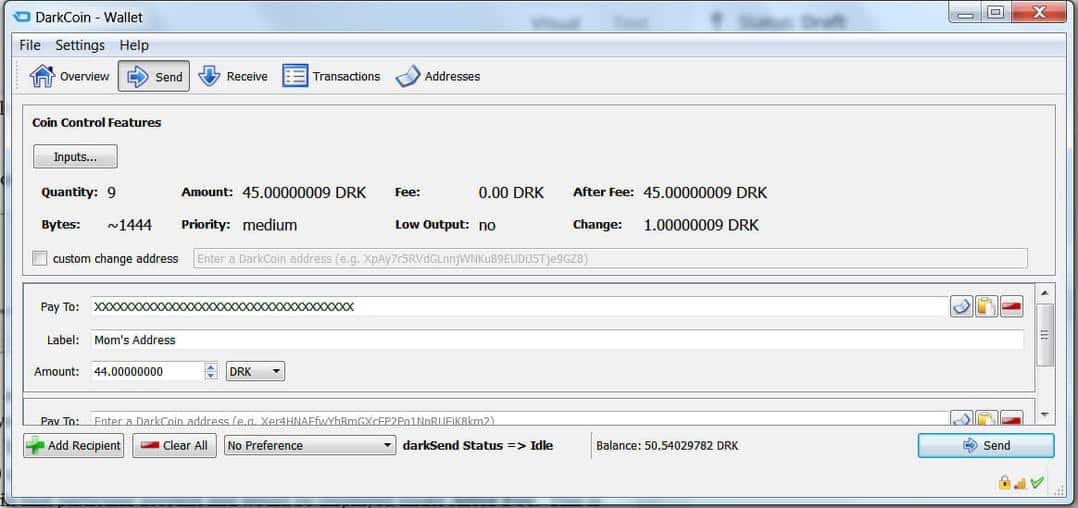
And I’m still not being charged! Finally, on this tab, you can have all your change sent to the same address, just enter it in the custom change address if you like. Eventually, when this address is over 1 coin, it will automatically be mixed. It would also be mixed if you had a bunch of small funds in many accounts that equaled over 1 coin, so it’s not necessary other than to keep the number of accounts in your wallet down to a minimum.
Can I Choose Which Darkcoins Are Sent Through Darksend?
Yes, you can. Now lets see what I did. What lies behind the Input button?
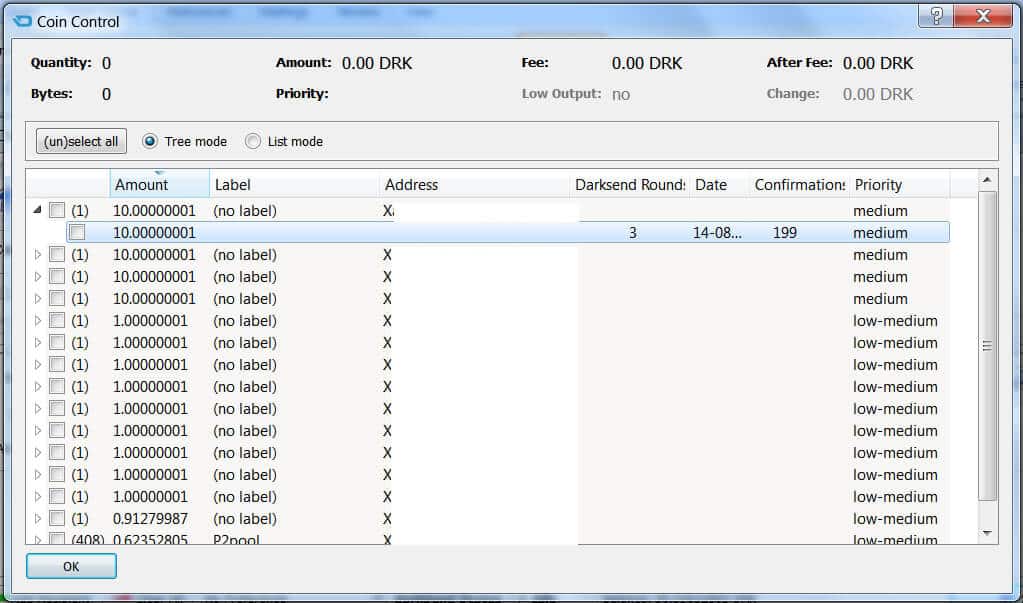
Here you can see the breakdown of all your coins. Each group of coins have their own anonymous account numbers that only you and your wallet can see. Don’t give these account numbers to anyone for sending funds! So, if you click on a box, you get a check mark and you’ve chosen that account to be used for your payment. You can click on as many accounts as you like. Say I wanted to send 24 coins. I might choose 2 – 10 coin accounts and 4 – 1 coin accounts, and click OK. Or you can let the wallet decide which funds to use.
I believe this window will be organized differently. It used to have headings such as 100, 10, 1 and those headings, when expanded, would show the individual accounts with those amounts listed under it. Somehow this organization is off in this first release. I’m sure it will be fixed soon, however the idea and function will be the same.
How Can I Check the Progress of My Darkcoin Transaction?
After a few hours, I checked on my wallet and saw that it had completed all my denominations. I could see under each account, that the DarkSend Round column showed a 3, meaning the funds were mixed 3 times. If you see a -1, -2 or -3, that is an indication of how many rounds are left according to your settings. I set my settings to do 3 rounds, so if I saw a -2, I would know those funds completed 1 round and had 2 to go.

On a brilliant little note, the wallet even pre-mixes a few fee amounts as shown above so that they’re at the ready when needed.
After checking all my funds, and that they had completed the process, I closed my wallet, as it still showed as being unlocked, and restarted it. I then hit cancel when it asked me for my passphrase. This shouldn’t be necessary, and I may not have waited long enough for it to unlock on it’s own. However, it’s a simple thing to do if you think your wallet is finished but not locking back up.
I hope this cleared things up for you and that if you were at all weary of this new wallet, that you now feel confident in the use of your DarkSend wallet. Enjoy your privacy and never accept anything less than what is your right to have, Financial Privacy!


Please note, I made a mistake about the meaning of the darksend rounds column in coin control. -2 means the coins are undenominated (not mixed), -1 means the client couldn’t find the previous input, 0 means there’s one round and so forth Per https://darkcointalk.org/threads/closed-rc4-testing.1830/page-34#post-13791
Sorry, I can’t edit the page anymore. Thank you for looking 🙂