Coinbase is one of the largest US based Bitcoin payment processors. They handle Bitcoin payments for over 35,000 companies including Dell, Expedia, and DISH Satellite TV. Currently, they’re not charging any fees on the first $1,000,000 in sales that you bring in. After a million bucks in sales, they’ll charge %1 fee per payment.
Sign Up and Get Started
To get started, you’ll need to sign up for an account. After you’ve signed up and verified your email address, you’ll need to link a bank account and verify a phone number.
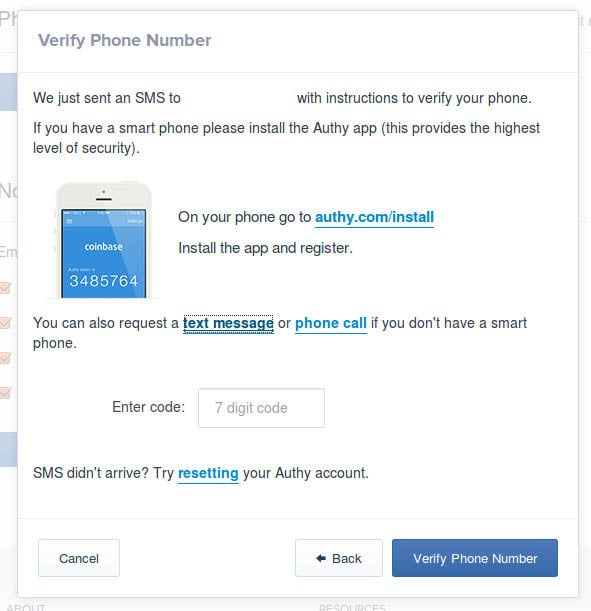
To verify a phone number, go to Settings > Phone Numbers on the Coinbase interface and click Verify A Phone. You’ll be prompted to enter a phone number. If it’s a mobile phone, you’ll be sent a text message encouraging you to install and register the Authy mobile app, that will in turn generate a 7 digit code that you can then enter to verify your phone number. If you don’t have a smartphone, or just prefer not to install another app, you can opt to receive a text message or phone call with a 7 digit code instead. To do this, just click one of the links in the “You can also request a text message or phone call if you don’t have a smart phone.” sentence. Once you receive the code, enter it into the box and click Verify Phone Number.
In order to get Bitcoin payments converted to cash, you’ll also need to link a bank account. Go to Buy/Sell > Payment Methods and click Add A Bank Account. You’ll be prompted to choose a bank account type, and enter your routing and bank account numbers. Afterwards, you’ll need to choose how you want to verify your bank account:
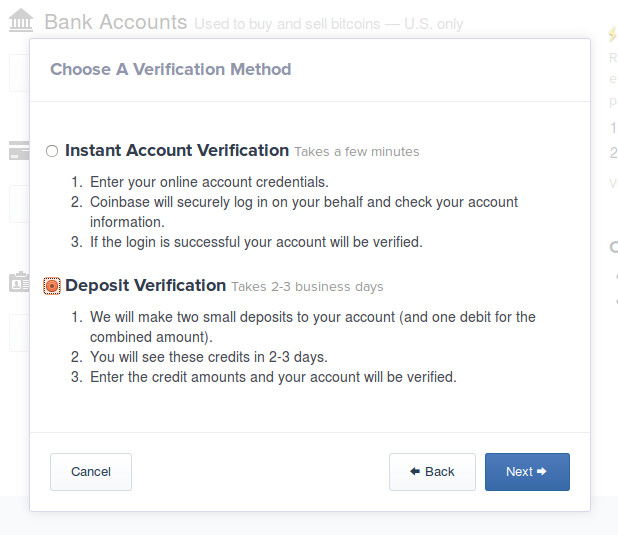
With the Instant Account Verification method, you’ll need to provide your online banking username and password so that Coinbase can log in on your behalf and verify your account information. This process only takes a few minutes, and Coinbase promises to protect your credentials by permanently deleting your username and password from their logs after the verification process is complete.
Alternatively, you can use the Deposit Verification method. This is similar to Paypal’s bank verification method: 2 small deposits are made into you account within the next few days. You then come back to the Verification page on the Coinbase website, click the Verify button next to your bank account details, and enter the deposit amounts:
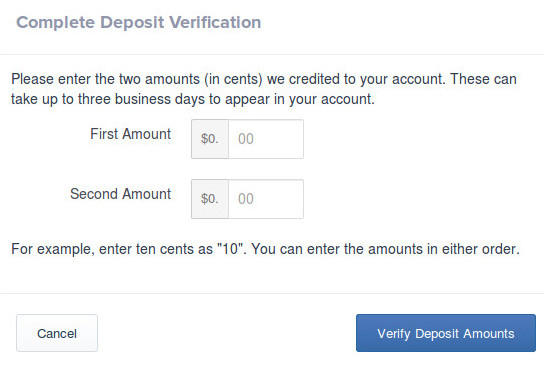
Personally, I’d go with the Deposit Verification method because it’s a poor security practice to share your username and password with anyone else. If you do choose to use the Instant Account Verification method, I’d recommend changing your online banking password once the Coinbase verification process has completed.
Start Accepting Bitcoin
Once you’ve verified your bank account and phone number, you’re ready to accept Bitcoin payments — up to $3,000 in sales per day, which can be increased by submitting more verification info. Checkout the Getting Started with Merchant Tools page for help with setting up your Bitcoin payment methods. The available Bitcoin payment methods include:
-
get paid with Bitcoin in person using an Android mobile device and the Coinbase Merchant app
-
add a Bitcoin payment button to your website or blog
-
install a Coinbase plugin for your website’s shopping cart software (i.e. Zencart, WooCommerce, Magento, etc.)
Automatically Convert Bitcoin To National Currency
You may also want to tweak your Coinbase settings so that all Bitcoin payments get automatically cashed out to US dollars and transferred to your bank account on a daily basis. This can be done on the Merchants > Merchant Settings page. By default, this Instant Exchange feature is disabled:
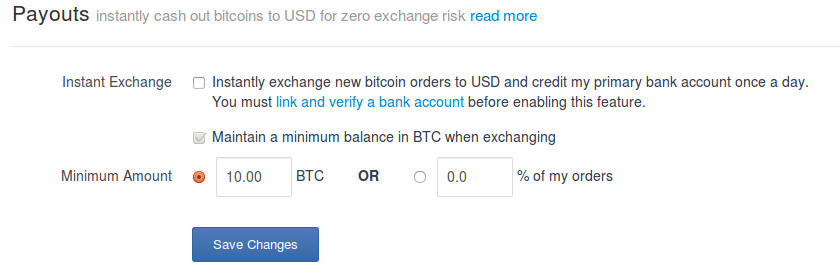
Check the Instant Exchange checkbox, uncheck the Maintain a minimum balance in BTC when exchanging checkbox, and click Save Changes. The Instant Exchange setting can’t be enabled until your bank account has been verified.